Karl's Alignment Procedure
How to adjust the rear toe on the NSX
You will need two 22-mm open-end or two large Crescent wrenches and two permanent ink pens (black and red).
1. Locate both rear toe links and mark your current settings with your BLACK permanent ink pen. This will allow you to return to your current setting at any time in the future. Note the arrows on the toe links. The toe link in the picture has the two arrows on either side of the turnbuckle lined up. This may not be the case with your toe links. It SHOULD be, but I have seen several that have not been aligned. If your toe link arrows do not point at each other before you begin (shame on the mechanic), you will need to add (or subtract) whatever it takes to line them up from the amount you turn the turnbuckle. More on that in a moment, just mark the turnbuckles as they now exist, and we can fine tune later using that reference.
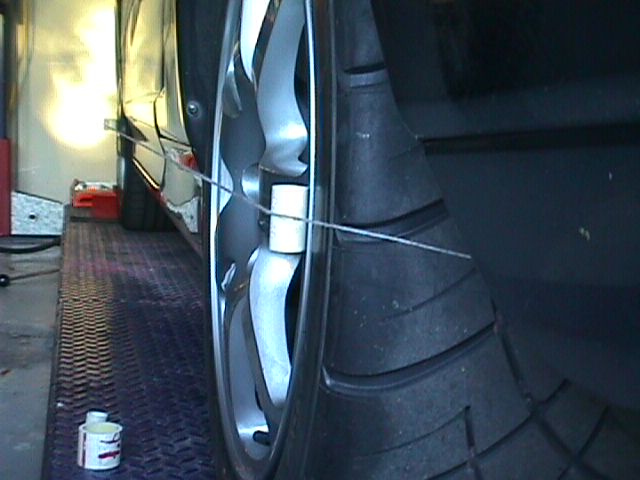
2. Now do a quick visual inspection. Look down the edges of the rear tires (line up the back edge of the rear tire with the front edge of the rear tire). You should see the same thing on both sides of the car. By the way, it really helps to have the front tires pointed straight ahead when you do this. You may want to put something against the lower edge of the front tires to give you more perspective. Above is a picture of my string and PVC spacers to help you visualize. This is only an exercise to get you familiar with what you are about to change.
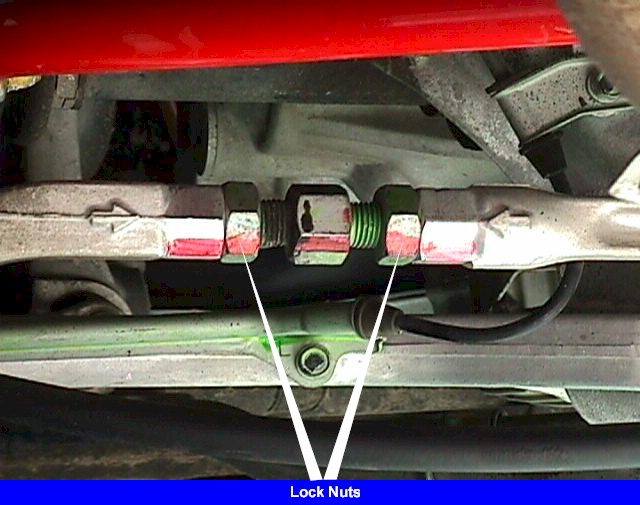
3. Now break the two lock nuts free (22mm open-end wrench) from the inner and outer toe links on one side of the car. Note that these lock nuts are on either side of a turnbuckle, so one will turn “the wrong way.” Look at the treads, and you should be able to figure it out. You will need two wrenches on the outer link to prevent damage to the ball joint, the inner link is mounted to the engine and will not rotate with the locknut but it’s a good idea to support it with the second wrench.
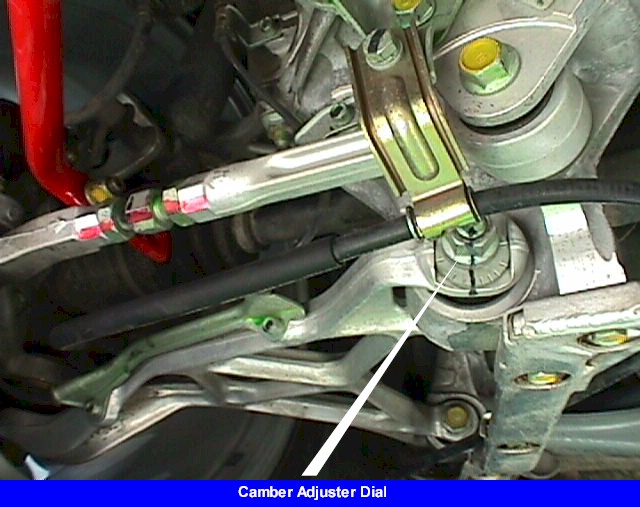
4. With both locknuts free, turn the turnbuckle either direction ONE FULL TURN. As long as the turnbuckle isn’t binding, you will not need to hold the outer link. Just let it rotate until it stops, about 30 degrees. That black line should be right back where it started and the arrows on the toe link should not be pointing at each other. Now do that same quick visual inspection down the edge of the rear tire. Big change, Right? Now return the turnbuckle to its original position, and line up the arrows. If your black line is not lined up, you probably had a lazy mechanic. You should easily be able to see how much you had to rotate the outer link to get the arrows to align. If you only tinker with the toe links (stay away from that Camber dial adjuster), you will be able to turn them as much as you like, go back and forth for different uses, etc. without needing to completely realign the rear end. The toe link is very precise, and for our range of motion has very little effect on the camber.
5. Now that you are getting familiar with how the link operates, you will want to turn your front wheels STRAIGHT ahead. Break the lock nuts free on the other toe link (after you make your black reference mark), and toe your rear tires in until they both point at the same place on your front tires (you will have to align the arrows as well). This is not precise, but it will allow you a crude check of your current alignment. Now return the turnbuckle to its original setting as you count the hex faces on the turnbuckle. Obviously all nuts and bolts have six faces, so two faces would be 1/3 of a revolution, three faces would be a ˝ revolution, etc. If you turned both equally, you have a balanced alignment, if not, you will need to learn how to use string and spacers to reset your toe precisely, or you can rely on your eyes to get pretty close. My first adjustment was visual, and it turned out to be quite good.
You should now be familiar enough to make the adjustment. If you want to reduce rear toe in, you will need to bring the toe links CLOSER together. I needed about 1/3 of a turn per turnbuckle to get to zero toe.
I turned one turnbuckle one full turn and after accounting for the change in rear track at my measuring point on the back edge of the rear rim, I came up with the following. Toe change: 0.302 inches at the rim lip (18.25 inches in diameter) yields a 0.302 inch x 25.4 (mm per inch) x 25 inch tire diameter / 18.25 inch rim diameter = 10.4 mm toe change. Divide that by six hex faces per bolt = 1.74 mm toe change per bolt face.
If
you have a recent print out of your rear toe, you should be able get exactly
where you want to be. If your toe link arrows did not line up when you started, you
will have to account for that now. You
will have to turn the turnbuckle HALF as much as the outer link was turned to
align the arrows, BUT in the other direction.
Yes, I know, you will need to turn the turnbuckle very little, but as I
said, the turnbuckle is very precise. Now,
mark this NEW setting in red. You
will notice the old black marks on the locknuts will still line up with the
inner and outer toe links. That’s
a good thing, since it allows for easy visual inspection to make sure the
locknuts are still tight. Just make
the red mark a little higher or lower than the black