Changing Front Brake Pads
| Time, Total Time, Cost, First-Time Cost | 30min, 1h05min, $100-200, $100-200 |
| Number of Persons | 1 |
| Difficulty level | 4 |
| Tools | Torque wrench, 12mm,14mm socket, 10" socket extension, wire, high-temp grease, c-clamp, channel locks, emery cloth, brake clean |
| Special Tools | None |
| Special Parts | Pads |
| Service Manual Pages | 19 -05 - 07 |
| Service Interval | Pad thickness less than 1.7mm |
| Prerequisite | Jack (20min), Front Wheels (15min) |
| THE FAQ (NSX Prime, www.nsxprime.com) |
Determining Pad Wear
First, let's make sure we really need to change our pads. The
service manual suggests changing the pads when they have less than 1.7mm of
material left. For reference, the backing plate is about 6mm wide, so
wait until the pad material is about 1/3 the size of the backing plate, then
replace the pads. If you are taking the car to the track, make sure you
have enough pad material to last the day or plan on replacing the pads between
sessions. Pads with wear indicators, like the OEM pads, will squeak or chirp when they
need replacing; this noise is the metal "sensor", which is part of
the pad, rubbing on the rotor. This noise will usually disappear when the
brakes are engaged. Pads without wear indicators (most track pads) will
grind and spark when they are worn to their backing plates <g>. We can inspect
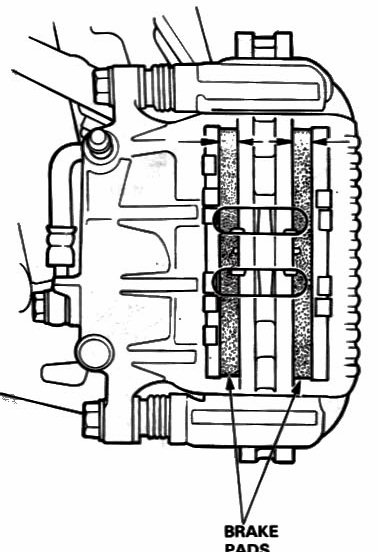
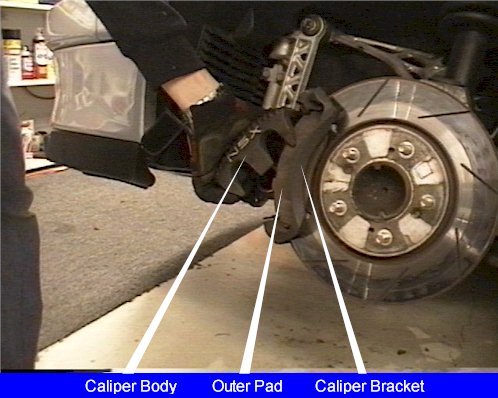
our pads by either removing the
wheel or looking between the wheel spokes and through the inspection ports in the
caliper body (picture below right).
Check out the brake overhaul section for some good pictures of our front calipers!
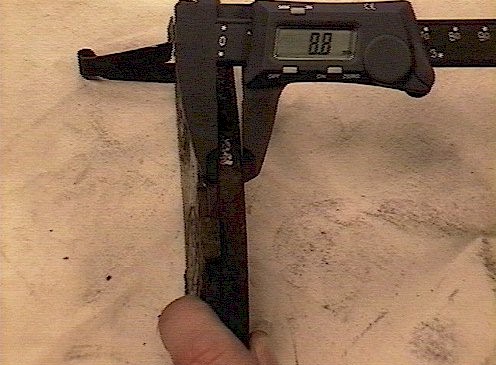
Above: these OEM pads have 8.8mm left.
Procedure
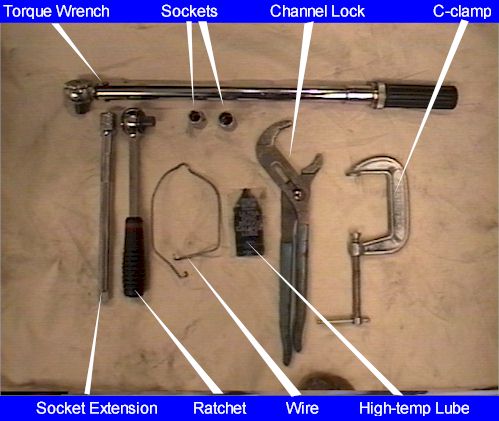
1. Prepare tools and pads. We will need a torque wrench, ratchet, 10" socket extension, 12mm and 14mm sockets, 3" C-clamp, channel locks, wire and high-temp lube. A can of Brake Clean and a piece of emery cloth will come in handy if the brake parts are dirty. The socket extension and 12mm socket are optional.
2. Jack up the car and remove the front wheels.
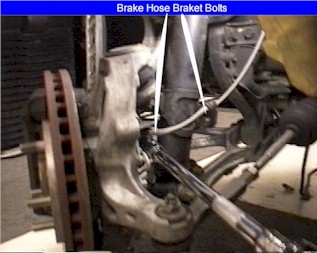
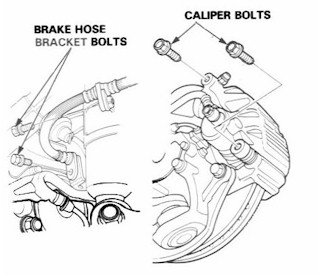
3. (optional) Remove the two brake hose brackets, use the 10" extension and 12mm socket. This step is optional because the caliper body can come off without stressing the brake hose. It's probably a good idea to do this step your first few times through just to give the brake hose a little more freedom to move around.
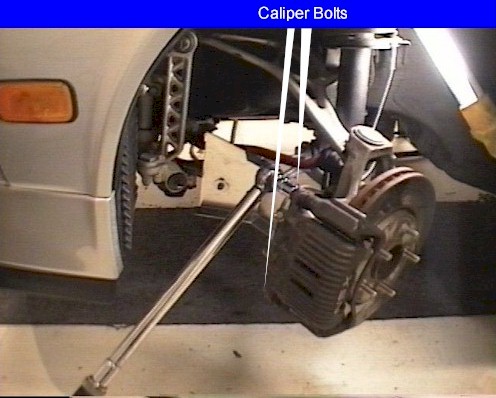
4. Remove the two caliper bolts, use the 14mm socket and torque wrench to break them free. Finish removing them with your fingers or the ratchet. Turning the steering wheel to the left/right will give you more room to work.
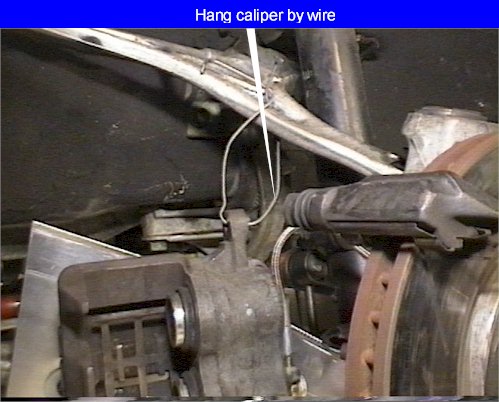
5. Remove the caliper body and support it with wire so it's not hanging from the brake hose. Removing the caliper can be a little tricky and may require a little bit of force if it's really crusted on. Watch the brake hose carefully to make sure you're not putting too much stress on it when wiggling the caliper body free. If you grasp the lower portion of the body and pull up, it will pivot around the upper portion and the lower portion will break free, this will not stress the brake hose. Finally, pull the upper body towards the front of the car to break it free. Have the wire handy to support the caliper. I run the wire through the upper caliper bolt hole and secure it to the upper control arm. You can also temporarily place (hook) the caliper on the control arm if you forget where you put your wire <g>.
![]()
6. Remove your old pads and shims. Not all pads come with shims so don't be concerned if you don't have these. The shims are supposed to reduce break squeal, they come new with OEM brakes. Unless they're really crusted on, the pads should come out by hand, if not, use a large flat-blade screwdriver to gently pry them out.
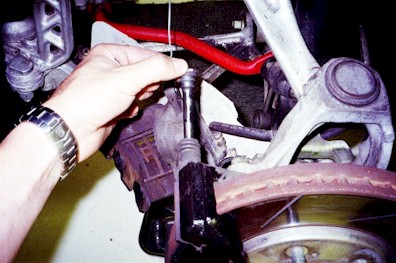
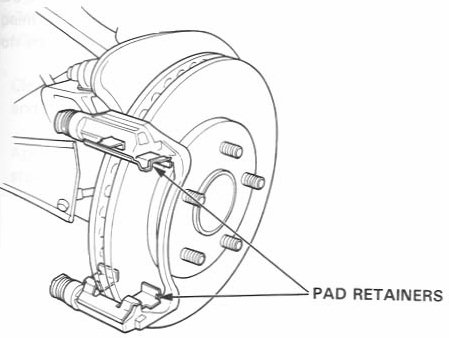
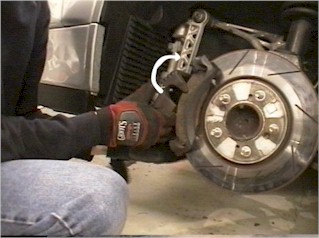
7. Remove the two caliper pins (above left), clean them off and grease them with high-temp grease, then reinstall. The pins pull out of the rubber pin boots. When reinstalling, make sure the two flat surfaces of the head are horizontal. Clean the upper and lower pad retainers with brake cleaner and/or your emery cloth. Note: WD-40 and other similar lubricants/cleaners should be avoided when working with the brakes.
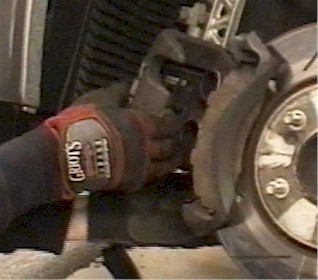
8. Install your new pads. Refer to the photo above step 6. If your pads have a wear indicator, install it on the inside. The OEM pad comes with three shims, install two on the inside and one on the outside. The OEM pads also come with Molykote M77 in a tube, spread this on both sides of each shim.
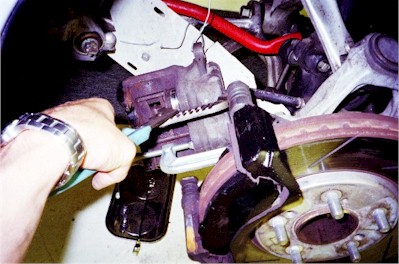
9. We'll assume your new pads are thicker than your old ones so you will need to retract the caliper pistons into the caliper body before installation. Use the C-clamp to push in the lower piston, the upper piston will probably go out as the lower one goes in, this is normal. Check your brake reservoir as you push in the upper piston with the channel locks. If you reservoir has been filled since your last brake change, it may overflow as you push in the piston. The excess fluid can be extracted with a turkey baster (see bleeding the brakes).
10. Remove the wire holding the caliper body and reinstall the caliper over the pads and onto the caliper bracket. The flat sides of the caliper pins will have to seat perfectly into the caliper body.
11. Install the two caliper bolts and torque them to 36 lb-ft (14mm socket). To avoid striping, these should be started by hand. get them both hand tight before torquing them. 36 lb-ft doesn't seem like much so be careful no to over-torque. If the caliper is not seated properly these are difficult to start. If this is the case then recheck the position of the caliper on the caliper bracket and make sure the pins are seated correctly.
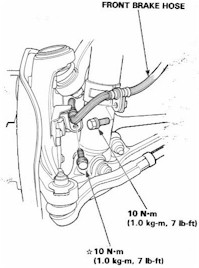
12. Install the two brake hose bracket bolts 16 lb-ft (12mm), if applicable (see step 3).
IMPORTANT STEP
13. Before lowering the car, pump the brake pedal several times
until you get a firm pedal. Remember pushing in the pistons (step #9),
this will push them back out until they hit the pads.
14. Install the wheels, lower the car and torque the lug nuts.
15. Check you brake fluid level in the reservoir and empty/fill as necessary so the fluid is at the MAX line.
16. Bed in your new pads!