Modifying the NSX’s Brakes for the Track
From the factory, the NSX comes
ready for your first few driver’s school events.
If you take it easy and focus on mastering your driving skills there is
no need to perform any major modifications to the braking system.
As your skills progress and you feel more comfortable with the track and
car and are really smooth, then you will have to turn to our after-market vendors
for parts and accessories to meet your right-footed demands.
“These OEM brakes SUCK”
Typically, the people who
complain most about their brakes are the fast novices; they ask their brakes to
do more then necessary—like going full-bore until the last braking marker then
stomping on the brakes and over-slowing for corner entry—can you say brake
barbeque rotor ka-bobs. According to Skip
Barber's book "Going
Faster: Mastering the Art of Race Driving" late
braking is the last thing we should be working on as it has the LEAST effect on
lap times.
Step 1: How to make OEM brakes NOT SUCK
(Free
a) Enter the corner at maximum
speed on the proper line
We can learn how to maximize
corner entry speed and therefore use the brakes less.
There are a lot of drivers out there over-slowing for corners.
At my local track, a good driver can come within 6-8 seconds of their best
lap time without even using their brakes—at the same time there are cars on the
track barbequing their brakes without going much faster than a “no brake”
lap. Why then, are they barbequing
their brakes? Because, they are
over-slowing for corners—they are barreling down the straightaway so fast that
they have to panic-cram on the brakes before heading into the corner, and
cramming on the brakes into a corner is a delicate art not done well by the
inexperienced. So, before we do a shish-ka-bob on our brake
systems, we should take it easy on the straight-aways
and learn how to properly enter each corner.
b) Engine brake and
heel / toe
The transition between
full-throttle and full-braking should be done as smoothly as possible. It’s not a bad idea to come off the throttle a little bit
before the brake markers, let the engine and wind do a little braking for us (it
may cost us a tenth of a second, but then again, the prize money sucks).
Don’t even think about going full-throttle/late braking until you have
mastered the heel/toe shifting technique. A
lot of harm can be done to your vehicle if this technique is not mastered and
you are driving full-bore into corners—you’re just asking for trouble.
Using the proper heel/toe technique we can let the engine do some braking
too. Engage the clutch around 6k-5k
rpm and let the engine do some work for our brakes.
c) Take a brake
Step 2: Keep Fresh Brake
Fluid at the Calipers
(Cheep)
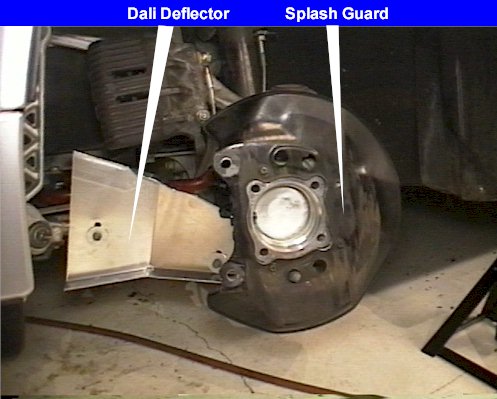
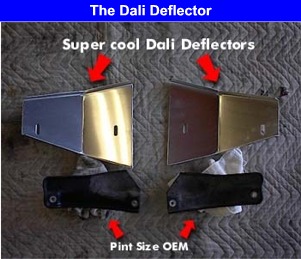
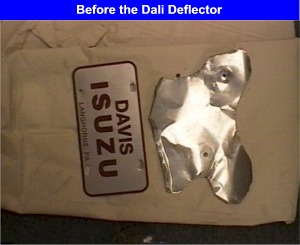
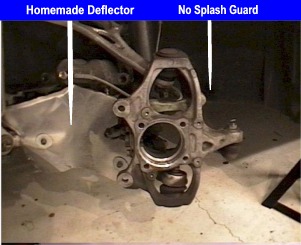
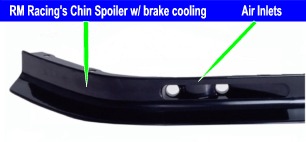
Step 3: Get Air to the
Front Brakes (Pretty Cheep)
Step
4: Switch to Track Brake Pads
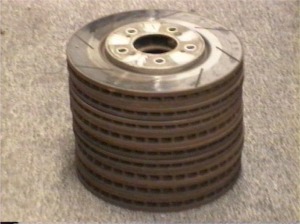
Step
5: Switch to Track Rotors
Step
6: Big Brakes
And when all else fails, there is always the BIG BRAKE
option. There are several packages available from our after-market vendors
www.comptechusa.com www.daliracing.com
www.rmnsx.com
Miscellaneous
As your heel/toe technique improves and you are getting deeper and deeper into the brake pedal when blipping the throttle, then adjusting your brake pedal up may be necessary. The procedure is a pain, but it makes all the difference in the world. It helps keep your right foot from inadvertently engaging the throttle under heavy heel/toe braking.
.jpg)